Chemistry For Conservators 02
Audiences waited seven years between ‘Alien’ and ‘Aliens’ for the continuing adventures of Sigourney Weaver IN SPAAAAAAAAACE, so two years ‘twixt instalments of my journey through the International Academic Projects ‘Chemistry for Conservators’ course is nothing to complain about. So there.
This course was not intended to crank out a newly-minted
Conservator at its conclusion, rather it was aimed at people like me with rusty
GCSE Chemistry who wish to understand more about the application of basic
scientific principles in a museum context.
Similarly the purpose of this series is not to analyse in
any particular depth the format and delivery of the course, but to outline what’s
involved along with any musings and highlighting some of the… highlights as we
go.
The TLDR version (how frightfully hip and with it) is that I very much
enjoyed this course, and while I wouldn’t say it gave any earth-shattering new
insights it was a fascinating exploration of the chemical principles underpinning
collections care that curators work with every day.
See https://academicprojects.co.uk/chemistry-for-conservators/
to learn more. Note it’s not a cheap course - costing over £800 when I signed
up in 2021 when I was lucky to have some savings (as for some reason the previous
year had been a fairly frugal one where I didn’t go out much). I felt though
that it was worth the cost to achieve some conservation-related CPD without
taking the extreme step of signing up for a conservation Master’s course –
though this does tempt me quite often… and have a go yourself!
In a joined-up-universe moment as I type I’m also still
merrily feeding the family negatives through the rather overworked image scanner – 16,000
+ counting now. Currently on December 1996.
WHAT’S IN THE BOX?
 |
| That's right kids - recycling images from previous articles. Eco-friendly as 'owt. |
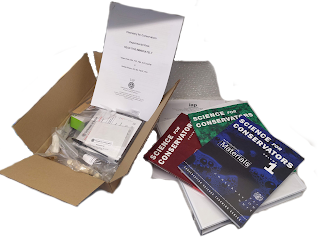
‘Chemistry For Conservators’ arrived as a hefty box of many
books, sinister-looking lab equipment and nasty-but-entertaining chemicals. It is
a course in four parts, each part comprising various experiments to conduct around
the home – literally, as some of the experiments run over several weeks I ended
up with jars secreted in various rooms, as well as assorted plastic strips
stuck to windows, stubs of candles in the bathroom and occasional nasty
substances bubbling in saucepans.
The results of each experiment were written up into
illustrated reports, the objective being that you demonstrated not only that
liquid x had turned pink but that you knew WHY this was so. Much of the
reporting structure format will be familiar to your average science lesson –
methodology / observations / conclusions etc etc… The highlight of this whole process, and what I considered to be the real meat of the course, was the
final section ‘Implications for Conservation’ which considered the real-world implications
of the outcomes of the experiments and looked for lessons which could usefully
be applied in collections work.
ASSESSMENT
The course was assessed on the strength of the experiment
reports as well as frequent quizzes/exams using the Moodle platform. While
mostly straightforward enough, I found that a number of the Moodle exam
questions were phrased in such an equivocal manner that even the massed ranks
of the family, who between them hold several science degrees, were none-the-wiser
as to what precisely was being asked! Ultimately in these cases an element of
trial-and-error saved the day, though it was hardly a scientific solution…
I did consider writing this entry in the format of an
experiment report, but it felt rather self-indulgent and so I didn’t. True
story.
Fortunately, the four parts of the course break down handily into four articles. Unfortunately, the four parts of the course get progressively more interesting, so stick with me on this first one.
PART 1
INTRODUCTION TO THE CHEMICAL EXPLANATIONS
OF THE PHYSICAL
WORLD
Experiments one and two were observed over three weeks, with test tubes and humidity sensors scattered around the house. Experiment two is eliminated ‘cos it was boring and I’ve already mentioned Relative Humidity elsewhere on this blog.
It’s probably most illustrative (and definitely not most
lazy) to quote some of the details of the experiments here, though I’ll only do
this for the more interesting or prettily-illustrated experiments. On that subject,
I did find that the ability to include photos of the experiments in the reports
was considerably more effective than trying to describe results long-hand like
wot we did at school; ‘The metal sort of turned green and fizzed a bit, then
the water went a bit like really strong blackcurrant juice’ etc.
Some of the results might feel like stating the bleedin' obvious, but as said earlier the useful part of the exercise is gaining the greater understanding of the WHY, rather than just observing the WHAT.
Here we go, lab coat on, safety goggles at the ready.
EXPERIMENT 01 - RUSTING OF NAILS
AIM OF THE INVESTIGATION
To explore the effects of air, water and pollutants on objects by carrying
out an experiment on the rusting of nails.
IMPLICATIONS FOR
CONSERVATION
-Steel objects are preserved better in dry environments.
-Exposure to moisture and oxygen is required for corrosion. Removing either the
moisture or oxygen from the environment will reduce or eliminate corrosion.
-When steel objects are exposed to water containing impurities, such as
electrolyte solutions, the greater the risk of corrosion.
-The natural oils in
bare skin promote corrosion, even when handling with clean hands, meaning
protective gloves should be worn when handling objects.
-Coating steel surfaces
in oil would reduce their exposure to oxygen and therefore reduce the
likelihood of corrosion.
FOLLOW-UP EXPERIMENTS
-Repeat the same experiment with nails made from different metals,
particularly brass, iron and copper to compare rates of corrosion.
-Experiment with objects with different thicknesses and surface areas to assess
e.g. whether thin objects with a large surface area corrode faster than thick
objects with a smaller surface area.
-Experiment with the same objects/materials with different protective coatings
e.g. paint, grease, being galvanised.
-Assess the rate of corrosion on the same objects/materials stored in different
temperature and light conditions to identify the optimum storage conditions.
-Assess the effects of corrosion on nails which have been handled by bare skin
on hands which are washed, un-washed, sweaty and so on.
EXPERIMENT 03 - DISPERSING A DYE
AIM OF THE INVESTIGATION
To disperse blue dye (Maxilon Blue) in water to assess how thinly the
substance can be distributed through a medium. It is hypothesised that, based
on previous observations of coloured dyes being introduced to water, as the dye
is mixed with greater quantities of water so the level of dispersal will
rapidly increase.
IMPLICATIONS FOR CONSERVATION
-Colour dyes in objects, particularly fabric dyes, can be rapidly dispersed
through immersion in water and should be protected from contact with liquids.
-Objects requiring cleaning should be exposed to the minimum
quantities of water to reduce the dispersion of dyes present.
-The rate of dispersal of dye from a sample of an object
could be used to determine which dye was originally used.
FURTHER EXPERIMENTS
-Experiment with water at different temperatures to assess e.g. if dye
disperses faster through warm water. (It is hypothesised that the more active
particles in warmer water will disperse the dye faster and therefore, if
correct, one implication for conservation would be that cold water should be
used when cleaning objects to slow the dispersion of any dyes present).
-Repeat experiment with different qualities of water e.g.
deionised/distilled to assess whether impurities in water affect dye dispersal
and therefore determine the optimum quality of water to be used to clean
artefacts.
-Repeat experiment with different colours of dye to determine if certain colours are faster to disperse than others – giving indication that objects of certain colours are particularly vulnerable to dye dispersal and should be protected accordingly.
Well there we go - the first module over.
I did enjoy the evaluative and ‘Future Experiments’ sections, though sometimes the temptation to begin ‘Well, if I was doing this in a proper lab instead of a kitchen…’ was hard to resist. Must admit though that this first module felt basic to the point of 'is this it?', but then I flicked through the course book to the later topics and saw that, by and large, greater complexity lay ahead.
Maintaining the
current schedule, an article concerning the second module ‘FIRST PRINCIPLES’ should be
completed in time for new year 2026. See you then!


Comments
Post a Comment